Leaf Mold: The Free Soil Conditioner Hiding in Your Yard
Every year, Florida yards drop a fortune on the ground, and most of us rake it into bags and haul it to the curb like it’s trash. It is not trash. It is next year’s soil, standing right there in a pile, waiting for you to stop throwing it away. Leaf mold is what happens when you let fallen leaves rot down on their own terms — slowly, coolly, and almost entirely without your help — into a dark, crumbly, forest-smelling amendment that turns Florida sand into something that actually holds water and feeds a soil food web. It costs nothing. It asks almost nothing of you. And it is, pound for pound, the laziest high-value thing you can do for a garden.
Fair warning: this is a slow magic trick. If you want fast, go make hot compost. If you want easy, keep reading — because leaf mold is the “set it and forget it” end of the soil-building spectrum, and Florida’s heat and rain actually make you better at it than most of the country.
What Leaf Mold Actually Is (and the Three Things It Isn’t)
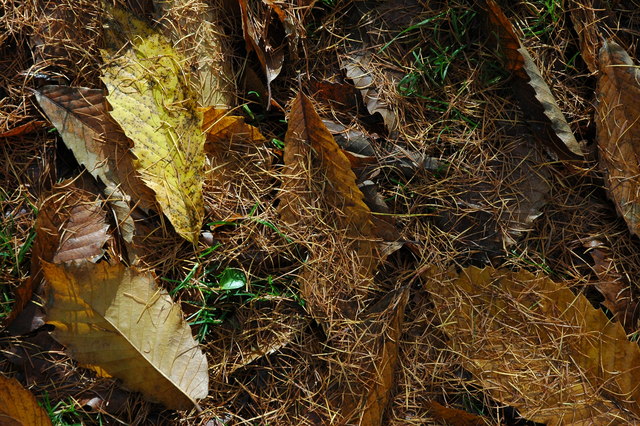
Let’s clear up the name first, because it confuses everyone: leaf mold is not moldy. Nothing fuzzy, nothing green, nothing you need to apologize to your doctor about. “Leaf mold” is just the old gardener’s name for leaves that have fully rotted down into a soft, dark, crumbly material that smells like a forest floor after rain. If it helps, call it leaf compost in your head. Same stuff, less confusing name.
Now the three things it isn’t:
- It isn’t regular compost. Compost is a balanced, hot, bacterial party — kitchen scraps, grass clippings, cardboard, and some leaves, all mixed so bacteria can tear through them fast. Leaf mold is leaves and only leaves, broken down cold and slow, mostly by fungi. Different crew, different pace, different pile. That’s why you don’t just dump all your fall leaves into your compost bin and call it done — a pile that’s almost all leaves is too carbon-heavy to run hot, so it stalls out as a sad, leafy lump instead of becoming either good compost or good leaf mold. (If you want the full compost comparison, Compost vs. Worm Castings walks through how the different soil foods stack up.)
- It isn’t exactly mulch, either — though young leaf mold makes a great one. Fresh leaves spread on a bed are mulch. Finished leaf mold is something more transformed: the leaves are gone, replaced by humus — the stable, dark, spongy end-product of decomposition. Young, half-rotted leaf mold still looks leafy and works beautifully as mulch. Finished leaf mold works as a soil amendment. Same pile, two careers, depending on when you harvest it.
- It isn’t fertilizer. This is the one people get wrong most often, and it matters: finished leaf mold carries only trace amounts of nitrogen, phosphorus, and potassium — the big three plants eat. If you’re hunting for free fertilizer, this isn’t it, and neither is compost. What leaf mold does is arguably more important: it rebuilds the soil itself so that the nutrients already there (and any fertilizer you do add) actually stay put and get used instead of washing straight through your sand.
Why Leaves Rot Differently: Fungi, Lignin, and the Slow Crew
Here’s the nerdy bit, and it’s genuinely wonderful. A leaf is not built to rot. It is built to survive a whole growing season outdoors without being eaten alive, and evolution gave it armor for the job: a waxy cuticle on the outside, tough fibers inside, and chemical defenses — lignin and tannins — that tell most microbes to go bother something easier. Kitchen scraps are a buffet. Leaves are a locked pantry.
Hot compost gets around this with brute force: a balanced mix of nitrogen-rich greens and carbon-rich browns feeds huge populations of bacteria, which generate real heat, which speeds everything up. Bacteria are the sprinters of decomposition — fast, hot, and hungry, but they are terrible at lignin. They mostly bounce off it.
Fungi, on the other hand, are the locksmiths. Many fungi make specialized enzymes that can crack lignin open — the same trick that lets mushrooms rot logs on the forest floor. Fungi don’t need a perfectly balanced pile, they don’t need heat, and they don’t need you to turn anything on a schedule. What they need is moisture, air, shade, and time. A lot of time. That’s the trade at the heart of leaf mold: almost no work from you, in exchange for patience. The fungi are the introverts of decomposition — no heat, no noise, no drama, just quiet, steady work in the dark. Honestly? Respect.
Leaves are also mostly carbon with very little nitrogen — in compost terms, they’re browns, through and through. That’s the other reason a leaf-only pile never heats up: there’s not enough nitrogen to feed a bacterial boom. And that’s fine. You’re not trying to run a bacterial boom. You’re running a fungal retirement home, and the residents prefer it cool.
What It Does for Florida Sand
Florida sand is, charitably, a colander with ambitions. Water pours through it, nutrients pour through it, and organic matter burns off fast in our heat. Leaf mold attacks all three problems at once, and this is where the soil science earns its keep:
- Structure and sponge. Humus is full of tiny nooks and crannies that hold water and air at the same time — the two things roots need most and sand provides least. Mixed into a bed, leaf mold turns “drains instantly” into “drains, but holds a drink for later.” In a Florida summer, that difference is the difference between watering twice a day and watering like a normal person.
- CEC, or the pantry shelf. CEC stands for cation exchange capacity, which is a fancy way of saying “how well your soil holds onto plant food.” Nutrients like calcium, magnesium, potassium, and ammonium carry a positive charge, and humus is covered in negative charges that grab them like a pantry shelf grabs jars. Sand has almost no shelves. Leaf mold builds shelves. That’s why people get confused and call leaf mold a fertilizer — it isn’t feeding your plants directly, but it keeps the food from washing away before your plants can eat. Same pantry, different job.
- pH buffering, gently. Organic matter tends to nudge soil toward neutral over time — not dramatically, not overnight, and not as a substitute for a real soil test if your pH is wildly off. But a bed that’s been fed leaf mold year after year is a calmer, more forgiving place for roots than raw sand. Think of it as a shock absorber, not a steering wheel.
- A microbiome habitat. Here’s the part that matters most and shows up least on a bag label: humus is housing. Bacteria, fungi, protozoa, springtails, earthworms — the whole underground workforce — live in and on organic matter. A bed rich in leaf mold is a bed with tenants, and tenants do work: cycling nutrients, gluing sand grains into crumbs, and keeping the bad actors in check. If you want the deeper story on that underground city, Living Soil for Florida Gardens is the tour.
None of this shows up the week you apply it. It shows up over seasons, as bed after bed gets a little darker, a little softer, a little more alive. Leaf mold is a compound-interest amendment. Start now, and future-you sends thanks.
Which Leaves to Use (and Which to Leave Out)
Good news first: most leaves work. Florida gives you a great roster. Live oak and laurel oak leaves are the backbone of a Florida leaf pile — plentiful, medium-textured, and they rot down well. Sweetgum, maple, and elm leaves are also excellent and break down a bit faster than oak. Mix what you have; a mixed pile rots more evenly than a pile of one single species, because different leaves bring different textures and break down at different rates, which keeps the pile from matting into a soggy pancake.
Now the slowpokes and the exceptions:
- Magnolia leaves — slow, but worth it. Southern magnolia leaves are thick, waxy, and built like little leather boats. They rot slower than oak leaves, and a pile of pure magnolia will test your patience. Shred them with the mower first, mix them with faster leaves, and they’ll get there. Don’t let anyone tell you magnolia leaves are useless — they’re just on island time.
- Pine needles — fine in a mix, with a myth to retire. The old warning that pine needles will acidify your soil is overblown; finished leaf mold from mixed leaves generally lands near neutral, and pine needles mixed into a pile are no villain. That said, a pure pine-needle pile is wiry, slow, and springy in a way that resists settling — so treat needles as an ingredient, not the whole recipe.
- Diseased leaves — leave them out. If a tree had a visible leaf disease, don’t put those leaves in a pile destined for your beds. Some pathogens survive a cool, slow rot, and the last thing you want is to mulch your tomatoes with last year’s blight. Bag diseased material for municipal green waste instead. Your pile should be boring, healthy leaves only.
- Black walnut leaves — skip them, or give them their own pile. Black walnut is the famous exception in the leaf world: its leaves (and roots, and husks) carry juglone, a compound that can stunt sensitive plants — tomatoes are famously fussy about it. Keep walnut leaves out of a pile headed for veggie beds, or compost them separately for a full extra season before using the result anywhere near sensitive crops.
- Street and gutter leaves — skip those too. Leaves raked out of the road or a storm drain can carry oil, brake dust, and whatever else the street collected. Your yard’s own trees are the clean source. Neighbor’s clean yard leaves, with permission? Absolutely. Curbside mystery leaves? Pass.
Three Ways to Make It (Pick Your Laziness Level)
There is no single correct container. There is only the one you’ll actually fill. Pick the method that matches your yard, your energy, and how many leaves we’re talking about.
1. The pen (best for big leaf hauls)
The classic: four posts and a ring of chicken wire or hardware cloth, wide and shallow rather than tall and narrow. A pile that’s wide and low rots more evenly, because the finished material forms at the bottom and center while a tall skinny tower leaves you with a small plug of good stuff and a lot of untouched leaves on top. A pen roughly four to six feet across and two to three feet high is a good target — and if you can take it apart (wire unhooked from posts), harvesting gets much easier later. Put it somewhere you can reach with a hose, somewhere shady if you have the option, and somewhere close to either the trees (easy filling) or the garden (easy hauling). You only get to pick one convenience, so choose the one you’ll curse less.
2. The bag (best for small yards and patios)
No space for a pen? Heavy-duty trash bags work. Fill them with damp leaves, poke a generous number of air holes (fungi need to breathe — a sealed bag just makes a sad, slimy science experiment), and stash them somewhere shady and out of the way. Bags rot slower than a pen because there’s less airflow and less fungal traffic, but they absolutely work, and they’re the answer for a yard with more patio than lawn.
3. The corner pile (best for the truly committed to doing nothing)
Just pile the leaves in a back corner, soak them, and walk away. No container at all. It works — it’s literally what the forest does — though the edges dry out faster and the pile spreads a bit. If your aesthetic is “functional chaos goblin,” this is your method, and I respect it deeply.
Whichever method you pick, three rules make or break it:
- Wet it down at the start, and keep it damp. Fungi work wet. Dry leaves just sit there, crisp and unbothered, for months. Soak the pile when you build it, and check it in dry spells — in Florida, summer rain usually does this job for you, but a dry spring can stall a pile fast. Damp like a wrung-out sponge is the target. Soggy and stinking is too far; if it smells like a swamp, it needs air, not water.
- Shred if you’re impatient. Running leaves over with a mower (bag attachment on, or a few passes and then rake) breaks the waxy armor and multiplies the surface area fungi can attack. Shredded leaves rot noticeably faster than whole ones. Whole leaves work fine — they just take the scenic route.
- Don’t build it where water ponds. Florida’s summer deluges will drown a pile sitting in a low spot, and drowned piles go anaerobic and stinky. Slightly raised ground or a spot that drains after a storm is what you want. Shade helps too — a pile baking in full Florida sun dries out from the top down even in a rainy summer.
Florida Timelines: How Long, Honestly
Anyone who gives you a single number for leaf mold is selling something. Real timelines are ranges, because leaf type, shredding, moisture, and your local weather all move the needle. That said, here are honest Florida ranges:
- Young leaf mold (great mulch): roughly 6–12 months for a shredded, well-watered pile started in fall or winter. It still looks leafy, but it’s soft, darkened, and already doing good work as mulch — suppressing weeds and holding moisture in the bed. (If you’re fuzzy on the mulch-vs-amendment line, Mulch vs. Compost sorts it out.)
- Finished leaf mold (the crumbly black gold): roughly 12–24 months for most Florida piles, with shredded oak and sweetgum on the faster end and whole magnolia leaves on the slower end. Our heat and rain genuinely speed things up compared to cold climates — fungi work year-round here instead of taking a winter holiday — but thick, waxy leaves still make you wait.
- Whole, unshredded leaves in a dry-ish spot: longer. Possibly well past two years for the stubborn center of a big oak pile. That’s not failure, that’s just physics. Shred next time, or start a second pile.
The genius move, if you have the space, is the two-pen rotation: build one pen this year and a second one next year, then alternate filling them. Once the rotation is going, you harvest one finished pen every year while the other one cooks. Future-you, the one with actual finished leaf mold every single season, is already smug about this.
How to Tell It’s Done
Finished leaf mold is unmistakable once you’ve seen it: dark brown to nearly black, crumbly like good chocolate cake (the comparison is mandatory — it’s a rule), no recognizable leaf shapes left, and it smells like a forest floor after rain. Not sour, not swampy, not like garbage — like woods. The bottom and center of the pile finish first; the top and corners lag behind. That’s normal. When you harvest, set the unfinished top and edges aside, take the finished middle and bottom, and put the unfinished stuff back in the center to keep cooking.
Store any extra in bags or a tote with the lid cracked — keep it moist, not wet. Bone-dry leaf mold is still usable, but it goes hydrophobic and takes a while to re-wet, which is annoying when you’re trying to plant into it. Ask me how I know. (Don’t. It’s a whole story.)
How to Use It
Finished leaf mold is gloriously unfussy about how you use it:
- Dig it into beds. A few inches worked into the top several inches of a bed before planting is the classic move. If you’re doing a full bed rebuild, pair it with the step-by-step in The Florida Fall Soil Reset — leaf mold is exactly the kind of organic matter that reset is hungry for.
- Mix it into potting mix. Leaf mold is a genuinely good peat moss alternative as part of a homemade potting mix — say, roughly equal parts leaf mold, coarse material for drainage, and something with a bit of body. Don’t plant straight into pure leaf mold and expect a balanced diet; remember, it’s a conditioner, not a fertilizer. Your seedlings will still want actual nutrition.
- Mulch with the young stuff. Half-rotted leaf mold spread a few inches thick around plants (kept off stems and trunks) suppresses weeds, holds moisture, and keeps breaking down right there in the bed, feeding the soil food web as it goes. It’s mulch that promotes itself to amendment over time. Efficient.
- Drop it in planting holes. A handful or two mixed into the backfill when you set out a transplant gives young roots a soft, moist, living zone to grow into instead of raw sand. Think of it as a welcome basket.
If slow, steady soil building is your whole philosophy — and if you’re reading this site, it probably is — Fix Your Soil While You Nap is the kindred-spirit guide for the same idea at bed scale.
The Mistakes That Stall a Leaf Pile
- Letting it dry out. The number-one stall, and the easiest to fix. If your pile looks like a box of cornflakes in March, soak it. Fungi can’t work in a desert.
- Building a tall, narrow tower. Wide and shallow rots evenly. Tall and skinny gives you a plug of good stuff and a monument to untouched leaves.
- Expecting fertilizer. If your plants look hungry after a leaf-mold application, they probably are — leaf mold doesn’t feed them directly. Feed the plants (compost, castings, a real fertilizer program) and let the leaf mold do its structural job. Different tools, different jobs.
- Burning your leaves. Open burning of yard waste is restricted or prohibited in many Florida towns and counties, so check your local rules before you strike a match — and even where it’s allowed, remember you’d be burning next year’s soil to make this year’s ash. The pile is the better ending for those leaves.
- Adding diseased or walnut leaves and hoping for the best. Covered above, worth repeating: your pile is cool and slow, which means it does not sterilize anything. What goes in diseased or juglone-loaded comes out still a problem. Keep the pile boring and clean.
- Overthinking it. This is the laziest amendment in gardening. You do not need a thermometer, a turning schedule, a carbon-to-nitrogen spreadsheet, or a degree in mycology. Leaves, water, air, time. The fungi have been doing this since before there were gardeners, and they have not once asked for a committee meeting.
Leaf Mold FAQ
Is leaf mold the same as compost?
No — they’re cousins, not twins. Compost is a hot, bacterial breakdown of mixed greens and browns. Leaf mold is a cool, fungal breakdown of leaves only. Both are wonderful. They do different jobs, and a garden with both is better off than a garden with either alone.
Will leaf mold feed my plants?
Only in trace amounts. It’s a soil conditioner, not a fertilizer. It builds structure, holds water, raises CEC (the pantry shelf for nutrients), and houses microbes — but your plants still need actual nutrition from compost, castings, or fertilizer.
How long does leaf mold take in Florida?
As ranges, not promises: shredded, moist piles often give usable mulch in roughly 6–12 months and finished, crumbly leaf mold in roughly 12–24 months. Whole leaves, magnolia, and dry piles take longer. Florida’s year-round warmth helps — fungi here don’t take winters off.
Can I use pine needles?
Mixed into a pile, yes. The old claim that pine needles will acidify your soil is overblown, and finished leaf mold from mixed leaves generally lands near neutral. Just don’t make a pure pine-needle pile — it’s wiry, slow, and springy.
What about magnolia leaves?
They work, slowly. They’re thick and waxy, so shred them with the mower first and mix them with faster leaves like oak or sweetgum. A pure magnolia pile will test your patience, but it gets there.
Do I need to turn my leaf pile?
No — that’s the whole point. Turning helps hot compost; leaf mold fungi prefer to be left alone. The only maintenance that matters is moisture: keep it damp like a wrung-out sponge.
Will it smell bad?
Finished leaf mold smells like a forest floor — earthy and pleasant. If your pile smells sour or swampy, it’s too wet and short on air: fluff it up, add some dry leaves, and make sure it isn’t sitting in a puddle.
Can I speed it up?
Shredding is the big one — a mower pass multiplies the surface fungi can attack. Keeping the pile damp and shaded helps too. Beyond that, the honest answer is: not much, and that’s fine. Leaf mold rewards the gardener who starts now and forgets about it, not the one who hovers.
So here’s the deal, Florida gardener: the trees already did the hard work. They grew the leaves, they dropped them on your lawn, and all that’s left is for you to stop bagging them like garbage and start piling them like the soil-builder they are. Build the pen this weekend — or just start the corner pile, no pen required — soak it, and let the fungi do what they’ve been doing since before gardens existed. A year or two from now, you’ll dig into the darkest, softest, sweetest-smelling stuff your sand has ever held, and you’ll wonder why you ever paid for a bag of anything to do this job. The leaves were free. The fungi work for free. The only thing it costs is the decision to start.
🌱 Keep learning
Three related guides worth reading next:
- Compost vs Worm Castings — How compost and castings differ — and when to use each.
- Mulch vs Compost — Mulch sits on top, compost goes in — know which job you need done.
- Know Your Amendments — A plain-English tour of soil amendments and what each one actually does.
🪱 Your Soil Needs This
Reading about healthy soil is great. Growing in it is better. Our small-batch, traceable worm castings are the shortcut your garden deserves.
Shop Worm Castings Subscribe & SaveEvery bag comes with a lot certificate. Know what's in your soil.