
Build a 3-Bin Compost System: The Backyard Factory That Never Stops
Here is the dirty secret of the compost pile in the corner of the yard: it is not composting. It is storing. A heap with no structure, no turning, and no plan just sits there getting rained on, growing a little ecosystem of its own, and producing — eventually, maybe, if the stars align — a small amount of something you could generously call soil. The heap is not lazy. It is unmanaged.
A three-bin system is what management looks like. Three bays, side by side, each about three feet cubed. One bin takes fresh material. One bin cooks. One bin holds finished compost, ready to use. When the ready bin is empty, the cooking bin moves over, the fresh bin moves into the cooking slot, and you start filling the empty one again. The cycle never stops, because you never have to stop adding scraps to wait for a pile to finish — there is always a bin for whatever stage your waste is in. That is the whole trick, and it is the reason serious composters end up here: it turns a hobby into a working process.
This guide is the build. Sawdust, screws, and a Saturday. The process — what goes in, how hot it gets, how to fix it when it smells — lives in our How to Make Hot Compost guide, and this guide links to it wherever the process matters. What follows is how to put the factory together, and then how to run it once it is standing.
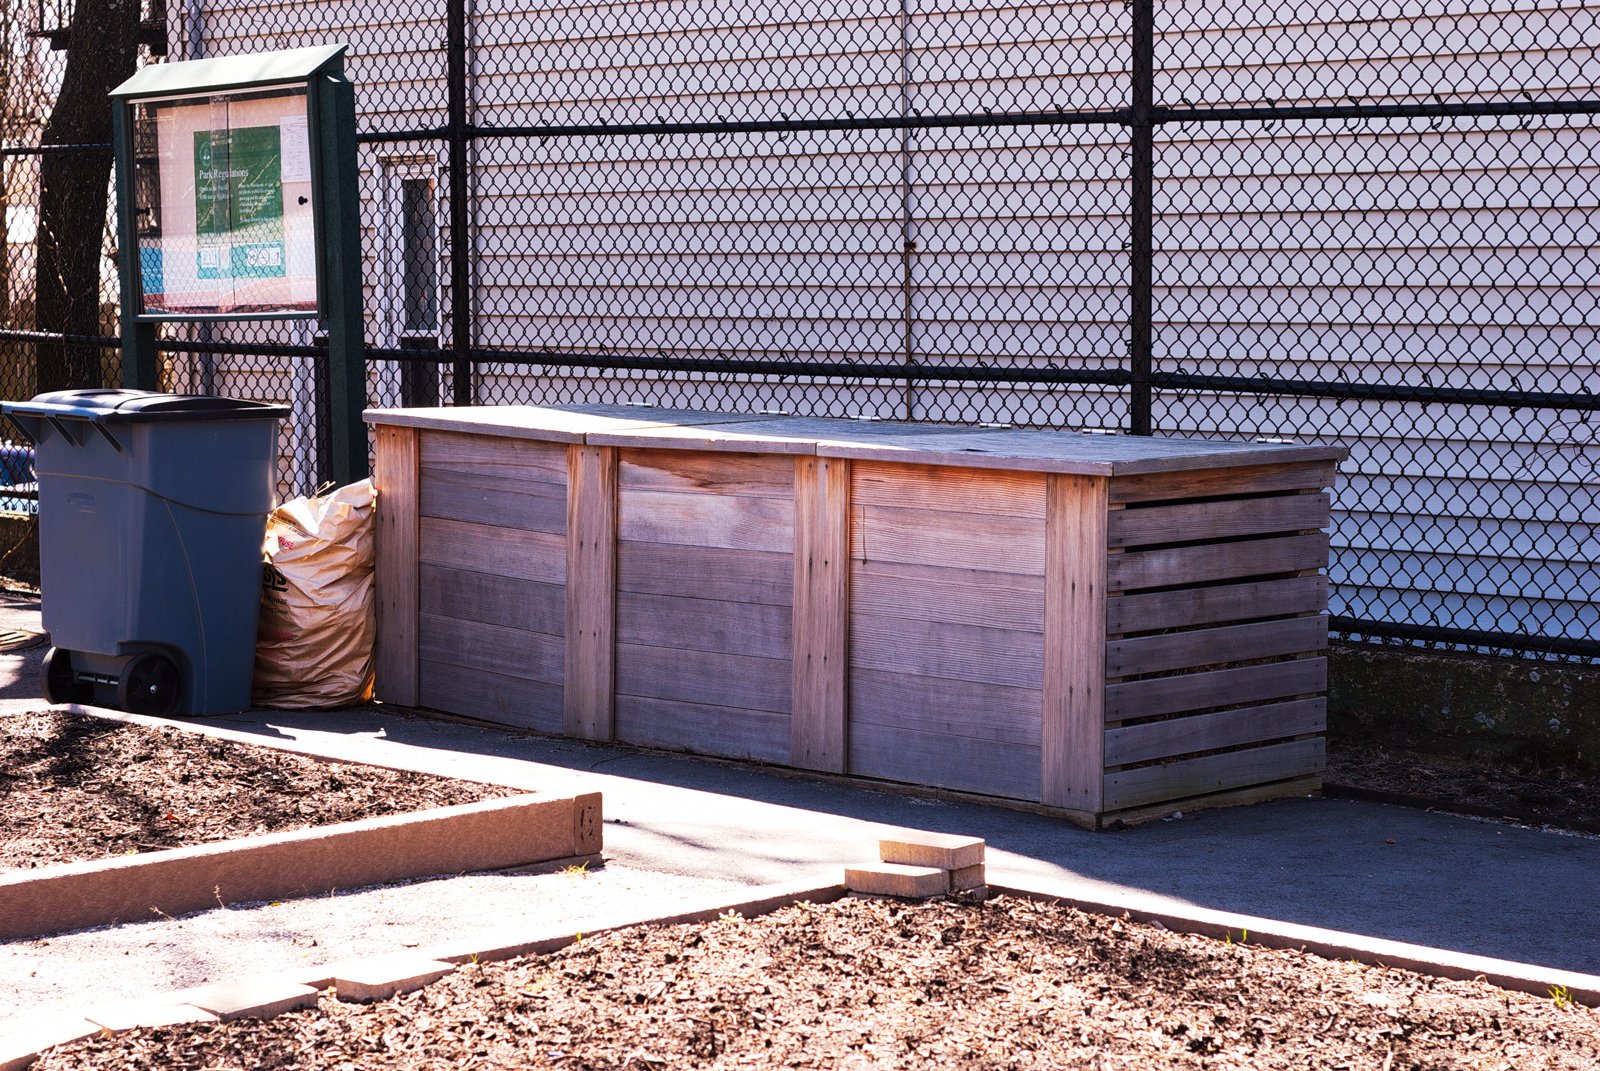
A three-bay wooden compost system doing exactly what this guide builds: one bay for fresh material, one cooking, one ready. Photo: Troy Sankey, CC BY-SA 4.0, via Wikimedia Commons.
First, the Honest Word on “Finished Soil in 60 Days”
You may have seen the claim floating around social media: waste in, finished soil out, sixty days. It is not a lie. It is a best case wearing a promise’s clothes. Sixty days is achievable — UF/IFAS Extension says a hot pile can produce compost in roughly six weeks — but only when several things are all true at once: the bin is full, a full three feet cubed of material, so it can hold its own heat; the mix is about three parts brown to one part green; the moisture is right, about as damp as a wrung-out sponge; and somebody turns it every four to seven days so the outside material gets its turn in the hot center. Miss any one of those and the clock stretches.
And here is the part the sixty-day claim usually skips: the clock starts when a bin is full, not when you toss in the first banana peel. Bin 1 fills over weeks, as your kitchen and yard produce waste. Then it cooks for four to eight weeks. Then it cures for two to four more. In Florida, with our heat doing half the work for you, a realistic first harvest is two to three months after your first full bin — and after that, a steady supply, because the bins keep rotating. Sixty days is the fast end of the range, not the guarantee. Build the bins right, run them right, and you will get there. Just do not mark it on the calendar in ink.
Why Three Feet Cubed? The Physics of a Pile That Heats Itself
Compost does not rot. It gets eaten. Billions of bacteria and fungi move into your scraps, chew them apart, and give off heat as a byproduct — the same way you give off heat when you exercise, except their exercise is eating your banana peels. When enough of them eat fast enough in a big enough pile, the heat builds up faster than it escapes, and the core climbs to 122–131°F, the range where decomposition runs fastest. Smaller than three feet cubed, and the pile loses heat out of its sides faster than the microbes can make it. Bigger is fine — a four-foot bin works too — but three feet is the sweet spot: the minimum mass that holds its own heat, and still a size one person can fork over with a pitchfork without hiring help.
That is also why the bins share walls. Three bins side by side, each three feet wide, make one nine-foot run. The shared dividers save lumber, and they save heat: a wall between two warm piles loses far less than a wall facing open air. The whole system is one insulated block with three rooms.
Pick Your Site Before You Pick Up a Saw
The bins will live in this spot for years, and moving a nine-foot wooden structure full of compost is nobody’s idea of a Saturday. Choose well, once.
- Level ground, good drainage. The bins sit directly on bare soil — never on concrete, never in a low spot that floods. Bare ground lets worms and microbes move up into the pile and lets excess water drain away. If your yard holds water after rain, build the bins up on a shallow gravel pad, six inches of coarse gravel under the footprint.
- Partial shade. UF/IFAS recommends a shaded spot, and in Florida this is not optional garnish. A bin in full sun in June dries out faster than you can water it, and a dried-out pile is a stalled pile. Dappled shade under a tree, or the shady side of a fence, is ideal.
- Hose in reach. You will water this pile the way you water a garden. If the hose does not reach, the pile will not get watered, and the pile will not compost. Put it within hose range and you have removed the most common reason bins fail.
- Room to work. The footprint is nine feet long by three feet deep, and you need about three more feet of clear space in front for standing, forking, and wheeling a barrow. Plan on roughly ten by six feet of yard, all in.
- Not against the house. Keep the bins a few feet clear of the house and fences — airflow matters, and thick organic matter against a wall invites termites and holds moisture where you do not want it. Ten feet from buildings is a good rule of thumb where you have the room.
Materials: The Lumber Build
This is the main build: posts and slats, the design that lasts years and looks like it belongs in a garden. A cheaper pallet version follows below. Quantities are exact for three bins, each 3 × 3 × 3 feet. Prices change by store and by week, so check yours locally — no prices here, just the list.
Lumber
- 8 posts, 4×4 × 4 ft. These are the skeleton: four along the back, four along the front, one at each three-foot mark. One foot goes in the ground, three feet stay above. Use modern pressure-treated lumber rated for ground contact (ACQ or copper azole) or untreated rot-resistant wood like cedar or cypress. Read the wood-safety box below before you buy.
- 23 boards, 1×6 × 8 ft. The slats for every wall: back, both outer sides, both shared dividers, and the removable fronts. Untreated pine, cedar, or cypress. (Why 23: ten wall sections of three feet, six boards per section, 180 linear feet total — 23 eight-foot boards covers it with a little spare.)
- 2 boards, 2×2 × 8 ft. Cut into six three-foot cleats that form the slots the removable front boards slide into.
- Optional lids: 3 panels, ½-inch exterior plywood, 3 × 3 ft — or corrugated roofing panels the same size, or a heavy-duty tarp with bungee cords. In Florida, a lid is close to mandatory (see the Florida section). Plywood lids want a handle screwed on top and a couple of coats of exterior paint or sealer, or they will delaminate in the first wet summer.
Mesh and fasteners
- ½-inch hardware cloth, 19-gauge, one roll 3 ft × 25 ft. This lines the back wall and the floor of the bins: 27 square feet for the back, 27 for the floor, 54 total — a 75-square-foot roll covers it with spare. Half-inch mesh keeps rats from tunneling up through the floor while letting worms, beetles, and drainage pass straight through. Do not use chicken wire for the floor: the holes are too big and the wire too flimsy to stop a determined rat.
- 3-inch exterior deck screws, 1 lb box. For posts and cleats.
- 1⅝-inch exterior screws, 1 lb box. For the slats.
- ½-inch staples and a staple gun (or ¾-inch screws with washers) to fix the hardware cloth.
- 2–3 bags coarse gravel for the post holes and drainage.
Tools
- Tape measure, pencil, carpenter’s square, and a 4-foot level
- Circular saw or a sharp handsaw
- Drill/driver with a drill bit and a driver bit
- Post-hole digger or a shovel
- Staple gun
- Work gloves and eye protection (non-negotiable when cutting treated lumber or hardware cloth)
- A scrap of 1×6 or a stack of washers to use as a ½-inch spacer between slats
⚠️ Read this before you buy wood: CCA, ACQ, and the pallet stamp
Not all wood is safe to compost against, and the rules changed while nobody was looking. Here is the short version, verified against extension guidance:
- Never use old CCA-treated lumber. CCA (chromated copper arsenate) was the standard pressure treatment until the EPA phased it out for residential use in 2003. The arsenic is the problem — and a University of New Brunswick wood scientist found that the organic acids formed during composting cause CCA wood to leach more than it does in a raised bed, which is why he does not consider CCA wood suitable for compost bins at all. If you have old greenish treated lumber lying around from before 2004, or any painted wood, do not build with it. Never burn treated wood, either — the chemicals concentrate in the ash and smoke.
- Modern treated lumber (ACQ, copper azole, micronized copper) is a different story. The University of Maine Cooperative Extension notes these replaced CCA in the early 2000s, are not known to leach into soils at harmful levels, and are generally considered low-risk. Using modern treated 4×4s for the ground-contact posts is a reasonable choice — but if you would rather not have any treated wood touching your compost, untreated cedar or cypress posts work and will last years in Florida if you keep them out of standing water.
- Pallets: read the stamp. A pallet stamped HT was heat-treated — safe. A pallet stamped MB was fumigated with methyl bromide, a pesticide — keep it away from anything destined for a food garden. Unmarked, oily, stained, or chemical-smelling pallets go back where you found them. When in doubt, skip it.
The Cut List
Everything below is cut from the materials list above. Cut it all before you start assembling — the build goes twice as fast when you are not stopping to measure every board.
- Posts: 8 pieces, 4×4 × 4 ft (no cutting — buy them at four feet).
- Slats: 60 pieces, 1×6 × 3 ft. Cut from the 23 eight-foot boards (two three-foot slats per board, with two feet of offcut each — save the offcuts for the front-board handles or kindling).
- Front-channel cleats: 6 pieces, 2×2 × 3 ft.
- Hardware cloth: one piece 9 ft × 3 ft (back wall); three pieces 3 ft × 3 ft (bin floors) — or one 9 ft × 3 ft piece laid across the whole footprint.
- Lids (optional): 3 panels, 3 ft × 3 ft.
Step-by-Step: Build the System
Give yourself a full Saturday, unhurried. Two people make it faster; one person with a level and patience can do it alone.
Step 1 — Mark it out
On your chosen site, mark a rectangle nine feet long by three feet deep with stakes and string. Check the corners are square (measure the diagonals — equal means square) and the ground is level across the rectangle. Scrape off grass and high spots; fill low spots with gravel, not soil, so water drains instead of pooling under the bins.
Step 2 — Set the posts
Dig eight post holes, one foot deep, at the corners of the rectangle and at the three-foot marks along both the front and back edges — four holes along the back, four along the front. Drop a few inches of gravel in each hole for drainage. Set a post in each hole, check it is plumb with the level on two faces, and backfill with soil and gravel, tamping firmly as you go. The posts should stand three feet above the ground and line up straight along both edges — run a string line between the end posts and nudge the middles onto it before the backfill sets. Walk away for an hour and let everything settle while you cut slats.
Step 3 — The back wall
Start with the back, because it is the longest run and sets the rhythm. Screw six slats horizontally across the back posts, starting at the bottom, leaving a half-inch gap between each board — your scrap spacer goes between boards as you work, so the gaps stay even. The gaps are not sloppy workmanship: they are the lungs of the system. Air has to get in from the sides or the pile goes anaerobic and starts smelling like a swamp. Screw each slat into each post it crosses with two screws per crossing, and check with the level every couple of boards — a wall that drifts now will haunt the front boards later.
Step 4 — Staple the mesh to the back
Unroll the nine-foot piece of hardware cloth on the inside of the back wall and staple it to the posts and slats, pulling it taut as you go. Trim the excess with wire snips and fold the cut edges flat so no sharp points stick into the bin. The mesh sits behind the slats, where the compost presses against it — it stops material falling through the gaps and stops pests pushing in from behind.
Step 5 — Sides and dividers
Repeat the slat work on the two outer side walls and the two shared dividers: six three-foot slats per section, half-inch gaps, two screws per crossing. The dividers are single walls — one set of slats serves both bins it separates. That is the whole economy of the design: two dividers do the work of four walls.
Step 6 — The front channels
This is the feature that makes the system usable instead of merely impressive. Screw a three-foot 2×2 cleat vertically to the inside face of each front post, set back from the front edge by the thickness of a slat plus a hair — about an inch. Each bin front now has a slot on each side, open at the top. The front boards will drop into these slots from above and stack like books on a shelf: slide them up and out to open the bin, drop them back in to close it. Test-fit one board in each bin before you move on — it should slide freely without rattling.
Step 7 — The floor mesh
Lay hardware cloth across the whole nine-by-three footprint, or one three-foot square per bin, pinning the edges down with landscape staples or a few bricks. The floor mesh is the rat screen. It also keeps the pile’s bottom layer from turning into a muddy mat on bare soil, while still letting worms in and water out. Do not put a solid floor in — a compost bin with a solid floor is a bathtub, and bathtubs do not compost.
Step 8 — Front boards and lids
Slide six front boards into each bin’s channels. Leave the top board out of the bin you are actively filling — an open top makes forking material in and out dramatically easier, and you can drop the last board in when the bin is full. Set the lids on top if you built them, or drape the tarp and bungee it to the posts. Stand back, check the whole run with the level one last time, and admire your factory. It is ready for its first load.
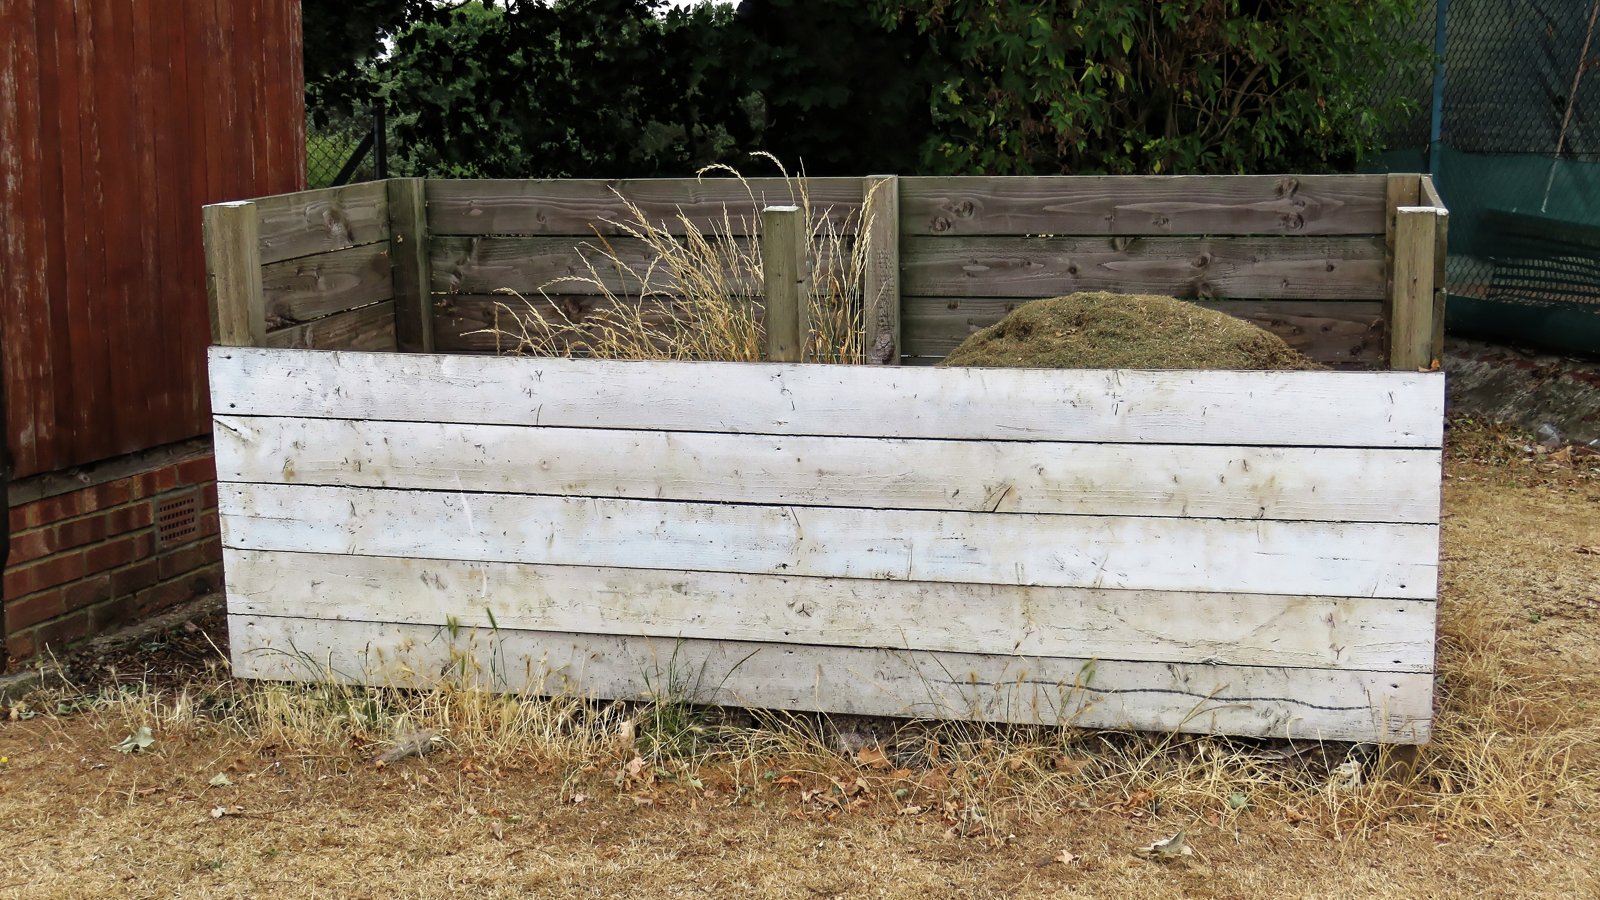
Slatted sides with half-inch gaps: the lungs of the system. Fresh grass clippings go in green and come out as soil. Photo: Acabashi, CC BY-SA 4.0, via Wikimedia Commons.
The Pallet Shortcut
If lumber prices make you wince, or you like the reclaimed look, the same system builds from pallets — and this is the design most people actually build first. You need seven to nine pallets, all stamped HT (see the wood-safety box above — never MB, never unmarked or oily).
Stand three pallets on edge in a U-shape for the first bin, screw them together at the corners with heavy-duty screws or bolt them through, and repeat for the other two bins, sharing pallets as the dividers wherever two bins meet. Seven pallets make three bins if you share sides aggressively; nine gives you a spare pallet to cut into thirds for removable front boards, one third per bin. Wire mesh on the back and floor works exactly the same as the lumber build. The trade-off is real: pallet slats are unevenly spaced, so airflow is less uniform and material sometimes falls through the wide gaps — staple hardware cloth to the inside of the pallet walls if that bothers you. The upside is real too: free pallets, an afternoon’s work, and a system that composts just as well as the lumber one.
How the System Runs Once It Is Built
The build is the easy part. The running is the craft. Here is the rotation, exactly as it works:
Bin 1 — Fresh materials in
Everything new goes here, and only here. Layer it as you add it: roughly three parts brown to one part green by volume. Browns are the carbon: dry leaves, shredded cardboard, straw, wood chips, torn-up newspaper. Greens are the nitrogen: kitchen vegetable scraps, coffee grounds, fresh grass clippings, green garden trimmings. Water each layer as you build it — the pile should feel like a wrung-out sponge all the way through, not just on top. A handful squeezed hard should give one or two drops, no more. When Bin 1 is full to the top — a full three-foot cube — stop adding and move it.
The move is the turn
Fork everything from Bin 1 into Bin 2. This is not a chore you do instead of turning; it is the turn, and it is the best one the pile gets: the outside material, which was cool, lands in the center, and the hot center material lands on the outside. Start filling Bin 1 again immediately with fresh material. The system is now running.
Bin 2 — Active decomposition
This is the furnace. A well-built Bin 2 heats up within days — you may see steam on a cool morning, which is a brag, not a problem. When the heat drops off after four to seven days, turn it: fork the material over inside the bin, or fork it into Bin 3 if it is ready to cure. Each turn re-oxygenates the pile and moves cool outer material into the hot core. If you have a long-stemmed compost thermometer, the sweet spot is 122–131°F; above 149°F the microbes themselves start dying, and the fix is more frequent turning, not more water. If the pile never heats, it is usually one of three things: too small, too dry, or too much brown and not enough green — add greens and water, and check the Compost Accelerators guide for the full list of things that wake a lazy pile up.
Bin 3 — Curing and ready
When Bin 2’s material has stopped heating after a turn and looks dark and crumbly, fork it into Bin 3 and leave it alone except for the occasional turn. No new material goes in here — that is the rule that makes the system work. Curing takes two to four weeks. The bin is done when the compost is dark brown to black, crumbly, sweet-smelling like forest floor, and you cannot recognize anything you put in it. The temperature will have settled back to whatever the air is. Fork it out, screen it through half-inch mesh over a wheelbarrow if you want a fine product for potting mix, and use it: top-dress beds, mix into planting holes, mulch around fruit trees, or stir into potting mix. Then Bin 3 is empty, Bin 2 moves over, Bin 1 moves into the cooking slot, and the cycle goes around again.
The timeline, honestly
Bin 1 fills over two to six weeks, depending on how much waste your household and yard produce. Cooking takes four to eight weeks with turning. Curing takes two to four weeks. Your first finished batch lands about two to three months after your first full bin — and after that, the bins rotate on a steady rhythm and there is always a bin ready or nearly ready. Winter slows everything down; Florida’s warm months speed it up. The system rewards consistency more than intensity: a little turning often beats a heroic turning once a season.
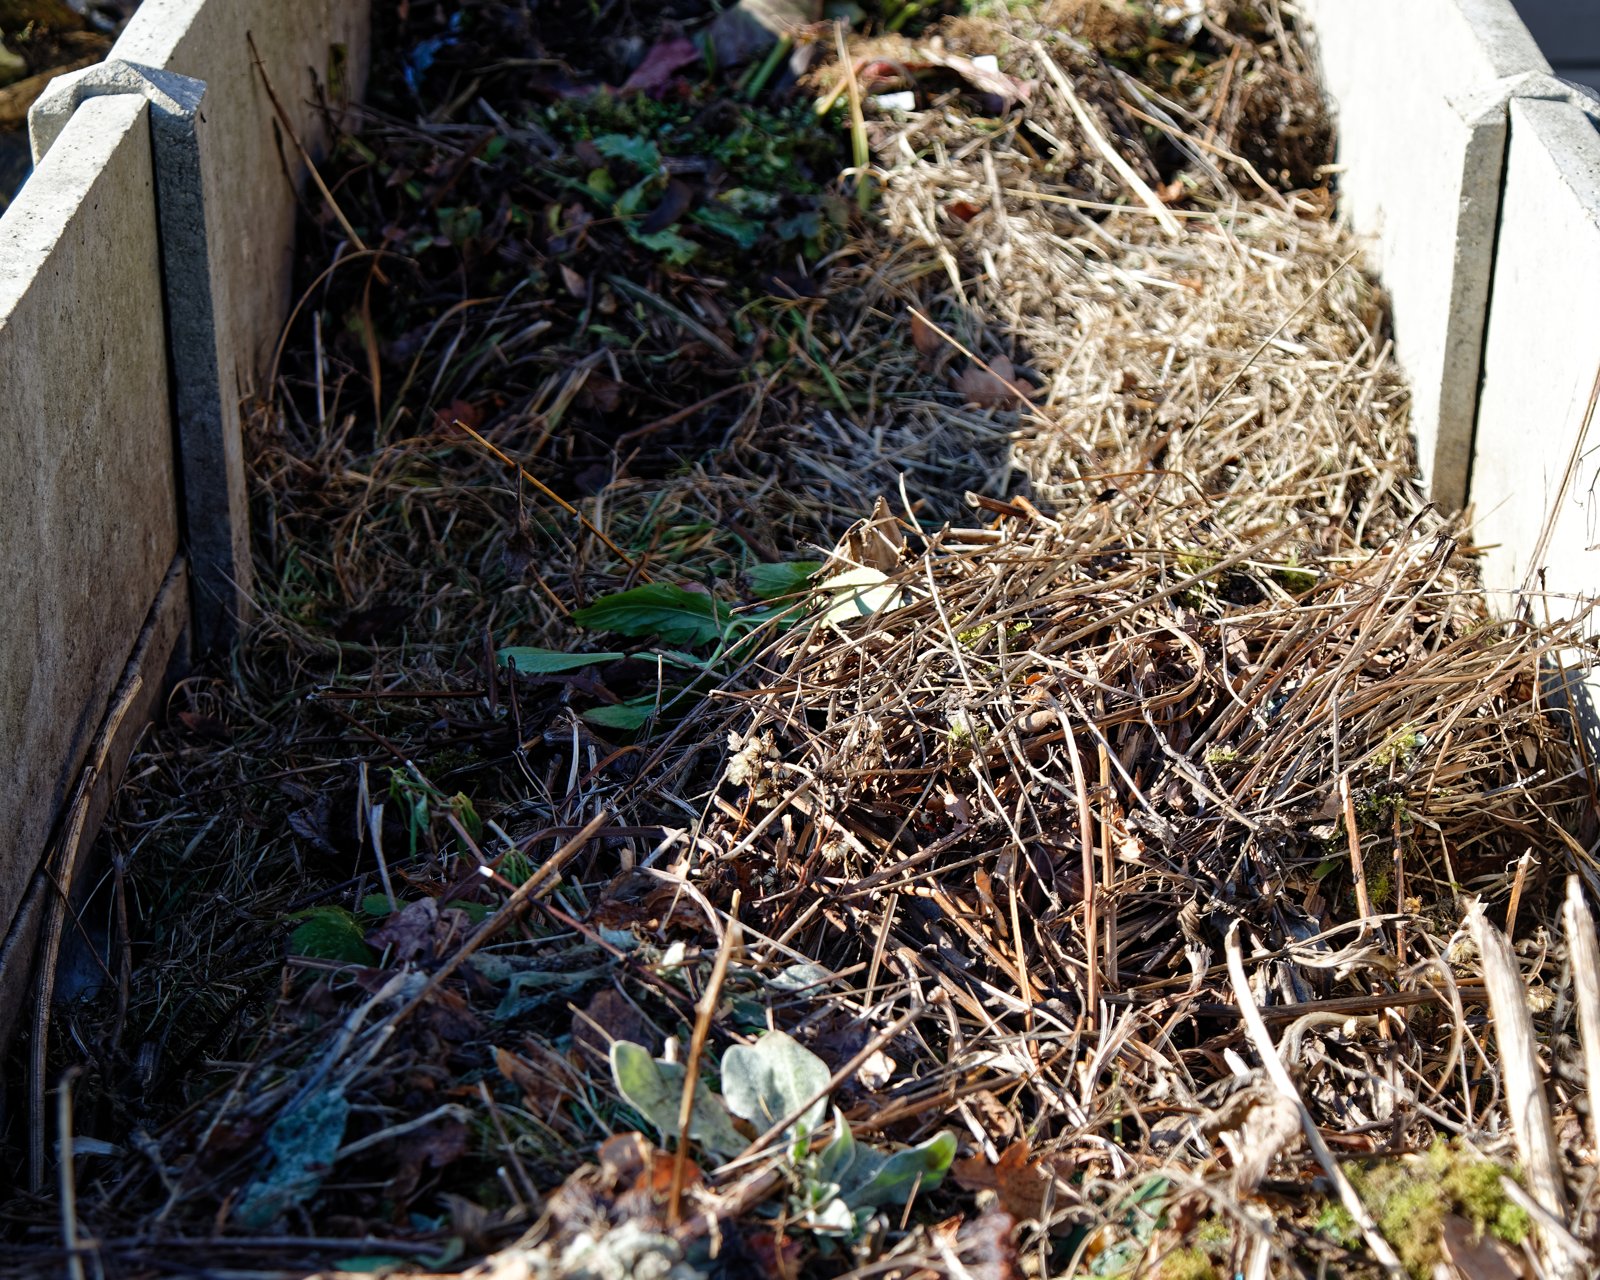
What it looks like mid-process: browns and greens breaking down together, unrecognizable a few weeks later. Photo: Acabashi, CC BY-SA 4.0, via Wikimedia Commons.
Florida Notes: Heat, Rain, Rats, and Neighbors
Florida is the best and worst place in the country to compost, sometimes in the same week. The heat that makes your pile cook in days also dries it out in May and drowns it in July. Manage the two extremes and the system practically runs itself.
Rain is the big one. Our rainy season runs June through September, and a bin with no cover in a Florida downpour becomes a swamp: waterlogged, airless, and smelly. That is what the lids are for. Keep a lid or tarp on the active bins during the rainy season, and pull it back after rain to let the pile breathe. If a bin does get soaked, fork in dry browns — shredded cardboard, dry leaves — and turn it. The browns soak up the excess water and reopen the air pockets. And site the bins where water drains away, never where it ponds.
Dry season is the other one. Late spring in Florida is hot and dry, and a pile in full sun can dry out in days. This is why the site needs shade and a hose in reach. Check moisture weekly in the dry months: grab a handful from the center and squeeze. If nothing comes out and the material feels like straw, water it until it feels like that wrung-out sponge again.
Pests are year-round here. Rats, mice, and snakes do not take winters off in Florida. The half-inch floor mesh and the back mesh are your main defense, and the habits do the rest: no meat, no dairy, no oils or fats, no cooked food in an open bin — those are the smells that bring rats. Keep the area around the bins tidy, no spilled scraps on the ground, and the bins themselves will not attract trouble. A black racer in the compost is actually good news: it is there eating the mice, and it is the reason you do not have more of them.
What not to compost in Florida. UF/IFAS is explicit: keep seed-laden weeds, diseased plants, and nematode-infested roots out of a home pile, because most home systems cannot reliably hold the 130–140°F needed to destroy them. In Florida that means, specifically: torpedograss and other invasive grass seed heads, air potato bulbils, diseased tomato or pepper plants, and any roots you suspect of root-knot nematodes. Meat, dairy, oil, and pet waste stay out of an open system entirely. Palm fronds go in only chopped small — whole fronds take forever and tangle your pitchfork. Treated or painted wood scraps are not browns; they are trash.
Neighbors and HOAs. A well-run three-bin system has no smell — the smell people associate with compost is the smell of a pile that is too wet, too green, or starved of air, and all three are fixable in an afternoon. Keep the bins tidy, the lids on, and the area swept, and most neighbors will not know what the handsome wooden structure in the back corner is. And the legal part is on your side: Florida’s Rule 62-709.305 exempts backyard composting from any Department of Environmental Protection permit or registration. (Your HOA’s rules are a separate question — check them, and lead with the tidy bins and the no-smell fact.)
Mistakes Worth Not Making
- Building too small. A two-foot bin will not heat, no matter how perfect the mix. Three feet cubed is the minimum, not a suggestion.
- Solid walls with no gaps. A bin sealed up tight is a sealed container, and sealed containers go anaerobic. The half-inch gaps are the lungs. If your slats swell shut in the humidity, pry a gap back open.
- Treating Bin 1 as the only bin. If you keep adding fresh material to the same bin forever, you have a storage heap with walls. The system only works when material moves. Fork it over.
- Skipping the lid in rainy season. One July downpour can waterlog a bin for weeks. Lids are cheap. Swamps are not compost.
- Wrong wood. Old CCA lumber, MB pallets, painted boards — all of them put things in your compost you do not want in your food garden. Read the stamp, read the label.
- Meat, dairy, and oil. They do not compost well in an open system, they smell, and they are a dinner bell for rats. Leave them out.
- Letting it dry out. A pile that feels like straw is a pile on strike. Water it. The microbes cannot eat what they cannot touch, and they touch things through water.
Frequently Asked Questions
How long until my first finished compost?
About two to three months from your first full bin, if you turn it and keep it moist. The sixty-day figure you see online is the fast end — a full, hot, well-turned pile in warm weather — not a promise. After the first batch, the rotation keeps a bin ready on a steady rhythm.
Do I really need three bins? Why not one big pile?
One pile works, but it forces a choice: either you keep adding fresh material and never finish anything, or you stop adding and wait. Three bins let you do both at once — one always receiving, one cooking, one ready. If you have the space, three bins are strictly better. If you do not, one bin with a disciplined turning schedule still makes good compost; it just makes it in batches instead of continuously.
What wood should I use?
Untreated cedar or cypress is the safest all-around choice. Modern pressure-treated lumber (ACQ or copper azole) is considered low-risk by extension guidance and is fine for the ground-contact posts, but many gardeners prefer untreated wood throughout. Never use old CCA-treated lumber, painted wood, or MB-stamped pallets for anything that will feed a food garden.
Can I build it from pallets?
Yes — seven to nine pallets, all stamped HT (heat-treated), screwed together with shared sides, and the ninth cut into thirds for the removable fronts. It is the cheapest version of this system and it composts just as well. Check every stamp: MB means methyl bromide fumigation, and those pallets stay out of the food garden.
What goes in each bin?
Bin 1 takes everything fresh, layered three parts brown to one part green. Bin 2 takes the full contents of Bin 1 once it is full — that move is the first turn. Bin 3 takes Bin 2’s material once it has stopped heating and looks dark and crumbly, and nothing new goes in there while it cures.
How often do I turn?
When the pile is hot and cooking, every four to seven days, or whenever the heat drops off. When it is curing in Bin 3, once or twice is plenty. Turning is how the outside material gets its turn in the hot center, and how oxygen gets back into the pile.
Why does my compost smell?
Because it is too wet, too green, or starved of air — usually all three at once. The fix is the same every time: fork in dry browns like shredded cardboard or dry leaves, turn the pile to let air in, and check the lid situation if it has been raining. A healthy pile smells like a forest floor, not a swamp.
Will rats or snakes move in?
Not if the mesh is intact and the habits are right. Half-inch hardware cloth on the floor and back stops tunneling, and leaving out meat, dairy, and oils removes the reason rats come calling. Snakes follow the mice, so a tidy, rat-free bin rarely hosts snakes — and a black racer in the garden is free pest control, not a problem to solve.
Do I need a lid in Florida?
Yes, or at least a tarp you actually use. June through September rain will waterlog an uncovered bin, and a waterlogged bin goes anaerobic and stops composting. Lids also keep the pile from drying out in the hot, dry weeks of late spring. Think of the lid as the thermostat and the raincoat in one piece of plywood.
What can never go in?
Meat, dairy, oils and fats, pet waste, diseased plants, seed-laden invasive weeds, nematode-infested roots, treated or painted wood, and whole palm fronds. Everything else from the kitchen and yard — vegetable scraps, coffee grounds, eggshells, leaves, grass, shredded cardboard, straw — is welcome, layered three parts brown to one part green.
Will my HOA object?
Check your HOA’s rules first — they vary, and they are separate from state law. Florida exempts backyard composting from DEP permitting, which is the state side of the question. On the neighbor side, a tidy three-bin system with lids and no smell is a much easier conversation than an open heap, and that is half the reason to build the bins in the first place.
🌱 Keep learning
Three related guides worth reading next:
- How to Make Hot Compost — the process itself: what goes in, how hot it gets, and how to fix it when it smells.
- Compost Accelerators — twelve things that actually wake up a lazy pile, from urine to spent mushroom substrate.
- Leaf Mold — the slow, quiet pile: what happens when you let fungi do the work while you do something else.
🪱 Your Soil Needs This
Reading about healthy soil is great. Growing in it is better. Our small-batch, traceable worm castings are the shortcut your garden deserves.
Shop Worm Castings Subscribe & SaveEvery bag comes with a lot certificate. Know what's in your soil.